
A good job sign off process is the short run of checks between the trade leaving site and the invoice going out. Done properly, it means every stage is finished, the evidence is in one place, the client has accepted the work and the invoice matches what was agreed. Miss one of those and the invoice usually comes back with a question attached, which is where payment stalls. This guide walks through closing a job in Plan@Job step by step, and says plainly which parts need your decision and which the platform handles.
It is written for operators. In Plan@Job, the operator is the contractor business running the work: managing the client, project delivery, any subcontractors and your own in-house operatives.
What "closed" should mean before you invoice
Agree internally what closed means before anyone touches an invoice. A workable definition:
- Every stage on the job is marked complete, including stages a subcontractor delivered.
- Photos and notes show the finished work, not just the start and the mess in the middle.
- Any snags found at handover are either fixed or written down as agreed with the client.
- Any change to scope or price has been agreed in writing and recorded on the job.
- The client has seen the completion report and accepted it.
If one of these is missing, the job is not closed. It is just finished on site.
Step 1: Check the project plan in Jobs
Start with the job record itself. In Plan@Job a job can be split into internal stages, each with its own scope, dates, status and costs, and each delivered either by your own team or by a subcontractor.
- Open Jobs and find the job you want to close.
- Work through each stage in the project plan.
- For in-house stages, confirm with the operative who did the work that it is complete and nothing is left on their list.
- For subcontracted stages, confirm the subcontractor has finished and that you are satisfied with the standard. Use Messages if you need photos or a quick answer.
- Update each stage status so the plan reflects reality.
This step is your decision. Plan@Job holds the record and shows you what is still open. It does not decide that work is done.
Illustrative example
Fictional scenario for illustration only. A bathroom refit is split into four stages: strip-out, first fix plumbing, tiling and second fix. Your operatives handle strip-out and plumbing. A tiling subcontractor does the tiling. Before closing, you check all four are marked complete, and you ask the tiler for photos of the grout lines and silicone before marking their stage done.
Step 2: Gather the evidence on the job
The client pays for proof as much as for the work. Get it in one place before you write anything.
- Collect finished-work photos from every stage, taken from the same angles as any before photos where you can.
- Add short notes on anything the client will ask about: a changed tile layout, a pipe rerouted, a part on back order.
- Attach any certificates or test records the work requires. Check the current rules for the trade involved, such as gas safety or electrical certification, rather than relying on memory.
- Write down any snags and whether they are fixed or agreed as follow-on work.
If evidence is missing, go back for it now. Returning to site for a photo after the invoice is disputed costs far more.
Step 3: Draft the completion report in Job reports
Open Job reports and start the completion report for the job. The report should read as a plain account of what was agreed and what was delivered.
Include:
- The agreed scope, in the client's terms.
- What was done, stage by stage or area by area, in plain words.
- The finished-work photos.
- Any snags, with their status.
- Any agreed changes from the original scope.
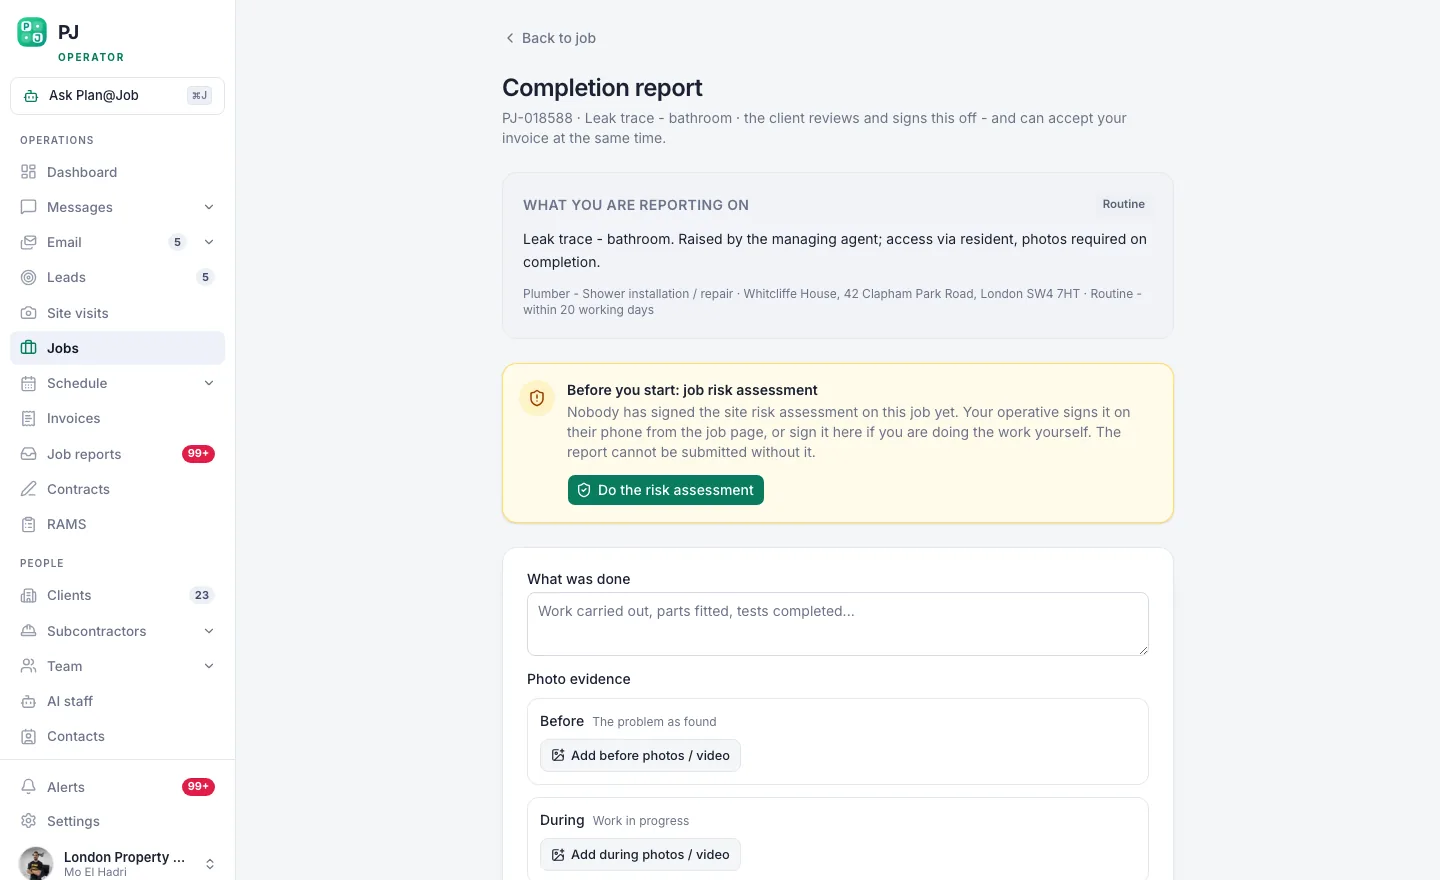 The completion report is the thing property managers actually pay for: proof the work happened.
Keep it factual. A client reading it in a hurry should be able to see the job is done without phoning you.
Step 4: Review the draft before the client sees it
Reports sit as drafts until somebody checks them. Treat that review as a real step, not a formality.
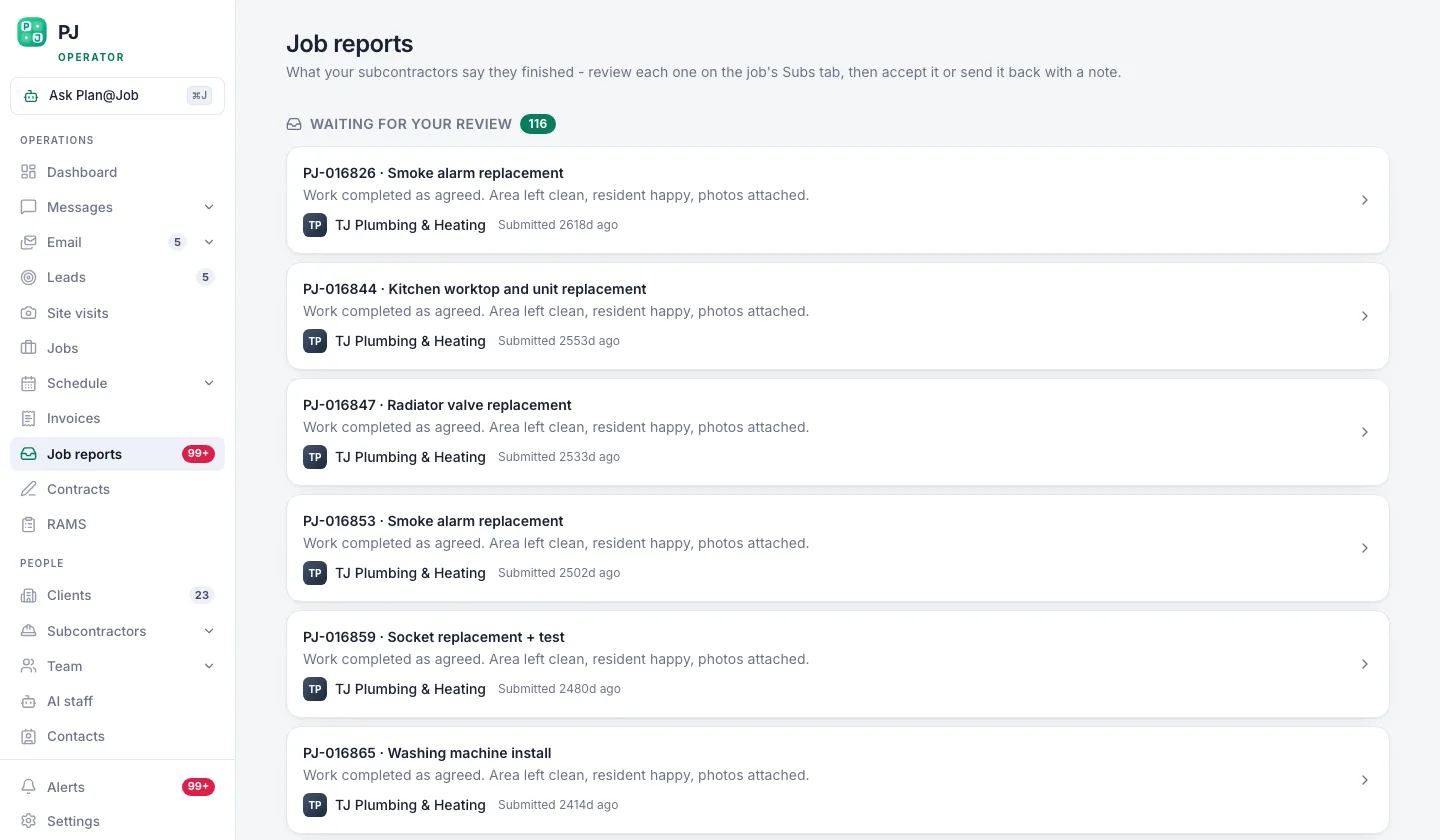 Reports queue up drafted, so a person checks them before a client ever sees one.
Read each draft against this checklist:
- Does the scope in the report match the scope the client agreed?
- Is every photo of the right property and the finished state?
- Are snags described honestly, with a clear status?
- Would anything in the photos need explaining first, such as a temporary fix or a visible defect that was there before you started?
On what the client sees: Plan@Job shows the client the overall agreed scope and price plus the evidence you share. Your internal stage costs and the identity of any subcontractor stay internal. You still decide what evidence to share, so the review is where you make that call.
This step needs a person. Nobody should send a report they have not read.
Step 5: Share the report and get the client's sign-off
Once the draft is right, send it to the client.
- Share the report so it appears in the Client portal for that client, where they can see the shared evidence.
- Let the client know it is there through Messages, with a one-line summary and a clear ask: please review and confirm the work is complete.
- If the client raises a snag, fix it, update the report and share the revised version. Do not invoice around an open complaint.
- When the client accepts the work, make sure the report shows as signed off in Job reports.
The client's acceptance is their decision. Your job is to make it easy to say yes by giving them everything they need in one place.
Step 6: Raise the invoice from the signed-off job
With sign-off in place, go to Invoices and raise the invoice from the job. Raising it from the job keeps the invoice tied to the work and the evidence, rather than to someone remembering what was agreed.
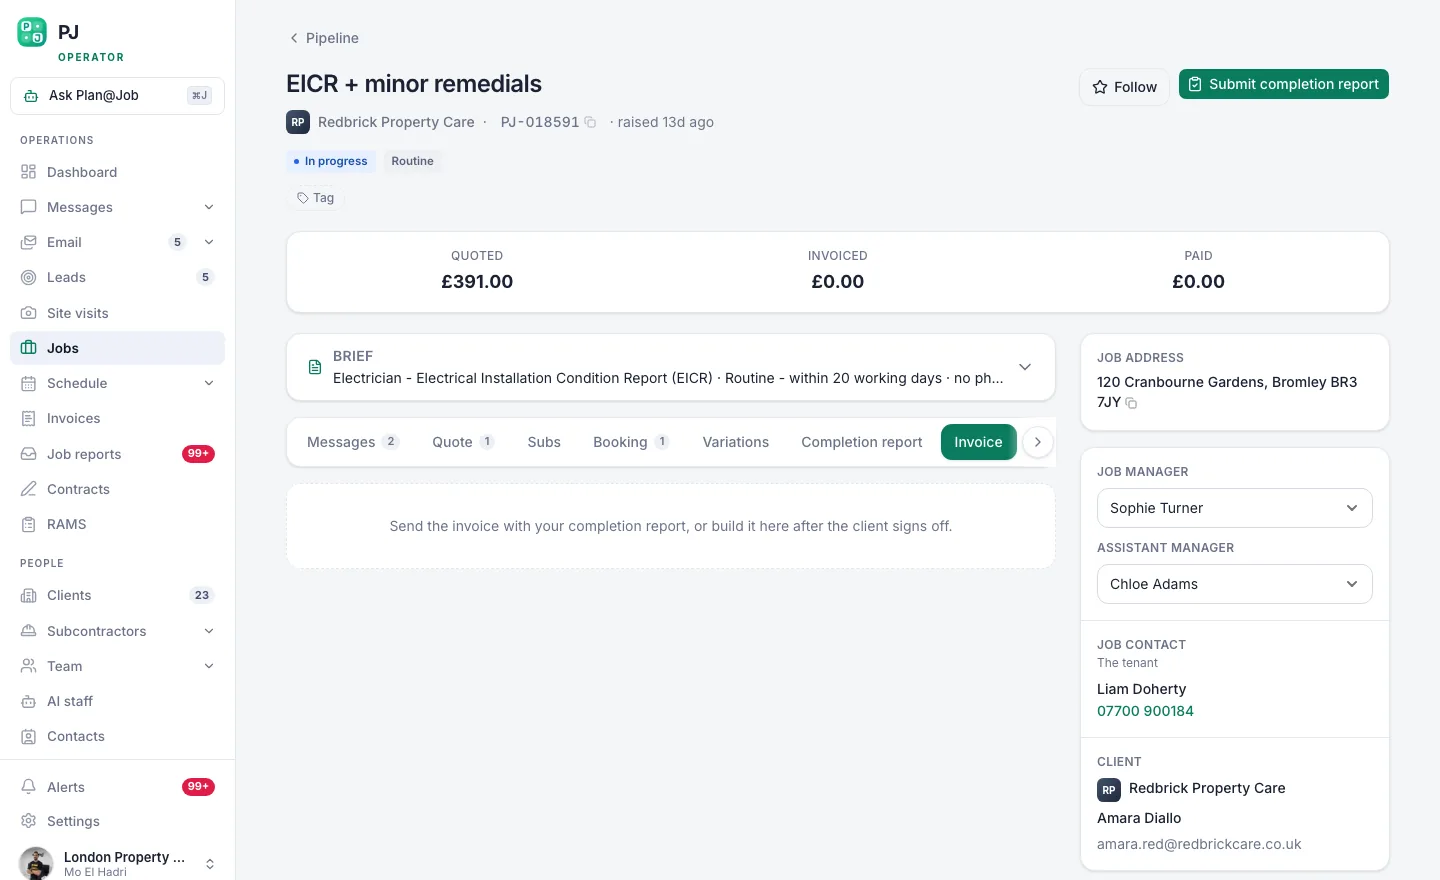 The invoice raises off the signed-off job, not off somebody remembering to raise it.
Before you send it:
- Check the amount matches the overall agreed price, adjusted only for changes the client agreed in writing.
- Check the client details, reference and any purchase order number the client gave you.
- Check your payment terms are stated clearly.
- Send it.
The invoice is billed at the overall agreed price for the job. Plan@Job does not split the client's invoice by internal stage, so your stage costs remain your own working figures.
Step 7: Track payment and follow up
When payment arrives, record it against the invoice. A record of payment is just that: a record. It does not move money. Money goes from the client's bank to yours as normal.
If an invoice goes overdue, Maya Collins, the AI Finance Coordinator in Plan@Job's AI staff, prepares overdue payment actions for you to approve. Maya works within fixed finance workflows. She does not send money, change your terms or decide anything on your behalf. You approve what goes out.
For statutory rights on late payment, check current official guidance on GOV.UK rather than quoting figures from memory.
Who decides what
A quick summary of where the line sits.
You decide:
- Whether each stage is genuinely complete.
- What evidence goes into the report and what is shared with the client.
- Whether a draft report is ready to send.
- The invoice amount and when it is sent.
- Whether to approve any payment follow-up.
Plan@Job handles:
- Holding the project plan, stages, statuses and costs in one record.
- Keeping reports as drafts until someone sends them.
- Showing the client the agreed scope, price and shared evidence, while keeping internal stage costs and subcontractor identity internal.
- Raising the invoice from the signed-off job.
- Preparing overdue payment actions for your approval.
What usually goes wrong, and how to avoid it
- Invoicing before sign-off. It feels faster. It usually is not. Wait for acceptance, then invoice.
- Subcontracted stages marked done on trust. Ask for photos before you close the stage, not after the client spots a problem.
- Agreed changes that live only in a phone call. If the price moved, get it in writing and record it on the job before you invoice.
- Reports sent unread. A wrong photo or a missing snag undermines the whole report. Read every draft.
- Snags left vague. "Minor snags" invites argument. Name each one and its status.
Next step
If your jobs close in a different place from where they are planned, the sign-off process will keep leaking time. See how Plan@Job project management keeps stages, evidence, reports and invoices on the same job, then look at Plan@Job for UK contractors to set up your business as an operator.
FAQ
Should I send the invoice before the client signs off?
Generally no. An invoice sent before acceptance is easy to query and easy to put aside. Getting sign-off first means the client has already agreed the work is done when the invoice arrives.
Will the client see what I paid my subcontractor?
No. The client sees the overall agreed scope and price and the evidence you choose to share. Internal stage costs and the identity of any subcontractor stay internal to your business.
What if the client goes quiet and never signs off?
Follow up through Messages with a clear, polite ask and a date. Keep the report and evidence up to date in the Client portal so there is nothing left for them to check. If you are unsure of your position on a long-running dispute, take proper advice rather than guessing.