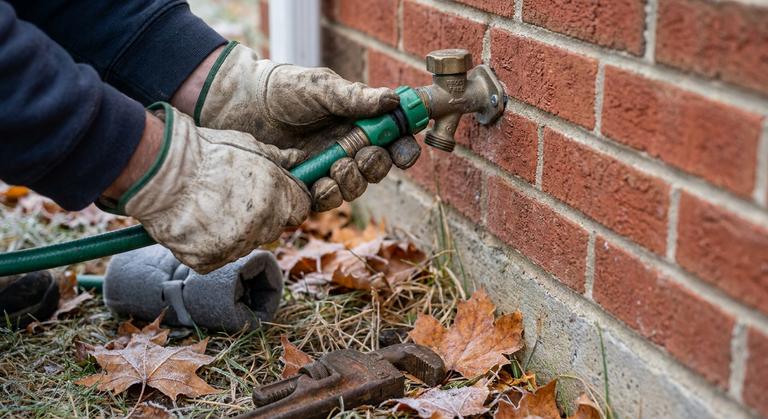
The first hard freeze rarely gives notice. In most of the country it shows up as a six-hour overnight dip in late October, and by the time anyone notices, a split hose bib has been feeding a stud bay for a week. Knowing how to winterize outdoor taps, Canada-wide, is not difficult work - roughly ten minutes per tap and an afternoon per irrigation system - but it has to be finished before that first dip, and it has to be recorded. Here is the sequence that holds up across a portfolio, the parts that actually fail, and how to schedule the work without losing track of which buildings are done.
How to Winterize Outdoor Taps: Canada's Freeze Window by Region
There is no national date. The deadline to winterize outdoor taps in Canada is the first sustained sub-zero night in your specific city, and that moves by weeks across the country.
- Prairies, northern Ontario and Quebec. Be finished by Thanksgiving. Edmonton, Saskatoon and Winnipeg regularly see hard frost while the leaves are still on the trees.
- Southern Ontario and the St. Lawrence corridor. A mild October is the trap. The first real freeze usually arrives overnight in early to mid November.
- Coastal BC. You can coast into December and then take an outflow event that holds the Lower Mainland below freezing for days. Split bibs cluster here precisely because nobody expects them.
- Atlantic Canada. Cycling, not depth, is the problem. Repeated freeze and thaw fatigues brass and works fittings loose, and a shutoff that weeps will quietly refill a line you thought was empty.
Set your internal deadline two weeks ahead of the average first hard frost for the municipality, using Environment and Climate Change Canada climate normals rather than last year's memory. Then book vendors early. Irrigation crews compress an entire season of blowouts into about six weeks, and the rushed jobs all happen in the last two.
Know What You Have Before You Shut Anything Off
You cannot winterize outdoor taps you have not found. Walk every elevation with a floor plan and mark each one, because portfolio buildings hide taps where nobody goes in October: parkade wash-down stations, roof bibs for window cleaning, mechanical room hose stations, laneway and garden suite exteriors, and planter irrigation on commercial patios. Then identify the type, because the shutdown differs.
Frost-free sillcocks
A frost-free (or freezeless) sillcock has a long stem so the valve seat sits inside the heated envelope, behind the rim joist. It drains itself through the barrel every time you close it, on two conditions: the pipe was installed pitched slightly downward to the outside, and nothing is attached to the spout. Leave a hose, a splitter or a brass hose-connection vacuum breaker on it and the barrel cannot drain. The trapped water freezes, splits the tube inside the wall, and nothing happens until April, when someone opens the tap for the first time and puts water into the ceiling below. It is the most common winter tap claim there is, and pulling hoses off in the fall prevents all of it.
Standard bibs on an interior shutoff
Older buildings often run a plain compression bib off a dedicated interior valve, sometimes a stop-and-waste with a small bleeder cap on the side. This type does not self-drain. Close the interior valve, open the outdoor tap fully, then crack the bleeder over a bucket so the trapped section empties. Skip the bleeder and you have left a horizontal run of standing water in an unheated joist space.
The Shutdown Sequence for Every Tap
The steps to winterize outdoor taps are the same whether you have two or two hundred:
- Remove the hose completely, drain it, coil it and store it inside. A hose left full outside splits too.
- Remove any hose-connection vacuum breaker, splitter, timer or quick-connect from the spout. Brass vacuum breakers hold water and crack reliably.
- Close the interior shutoff serving that tap and label it. A tag reading
outdoor tap, NE cornersaves the next person forty minutes. - Open the outdoor tap fully and leave it open all winter, so any residual water has somewhere to expand.
- Crack the bleeder cap on the stop-and-waste with a bucket underneath, and close it once it stops dripping.
- On a frost-free, listen after closing: the barrel should drain and go silent within a few seconds. One that keeps weeping has a failed seat and needs replacing now, not in March.
- Insulate exposed above-grade pipe and fit an insulated cover on taps mounted to unheated walls. Covers buy hours in a cold snap, not weeks, and never replace draining.
- Check heat trace where it exists: plugged into a GFCI-protected receptacle, cable and thermostat intact, and not unplugged back in July for a pressure washer.
Irrigation Blowouts: What a Proper Job Looks Like
In most of Canada the laterals sit above frost depth, so compressed air is the only reliable method. Gravity draining leaves water in low spots, in heads and in drip tubing, and that is where the cracks start.
- Shut the irrigation supply at the interior isolation valve and open the mainline drain if there is one.
- Use a compressor with real volume. CFM does the work here, not pressure. A hardware store pancake compressor will run all afternoon and still leave water in the lines.
- Stay well under the pressure rating of the weakest component in the system, and never pressurize a closed system. A zone opens before the air valve does.
- Work zone by zone, furthest from the compressor first. Stop each zone when the mist turns to dry vapour; running past that point spins gear drives dry and cooks the internals.
- Handle drip and micro-spray zones separately, at lower pressure.
- Never blow air through the backflow assembly. Isolate it, leave its ball valves at roughly 45 degrees, and crack the test cocks so residual water escapes.
Eye protection is not optional. A charged zone will launch a pop-up head or a cap, and nobody should be standing over one when it does.
The backflow assembly is the expensive part
The RPZ or double check assembly on an irrigation service is usually the priciest single component outside, and a freeze cracks the body rather than just the internals. Most Canadian municipalities also run a cross-connection control program requiring a certified tester to test the device and file a report annually in line with CSA B64.10, so a February freeze means replacement, a retest and paperwork with the city before you can start the system in spring. Check your local bylaw for the reporting requirement. If the assembly sits in an outdoor enclosure or a vault, it either comes inside for the season or gets properly insulated and heated.
Where the Floods Actually Happen
- Vacant units and turnovers, where nobody is present to hear water running.
- Garden suites and laneway houses, where the tap often has no interior shutoff and the tenant is the only person who touches it.
- Buildings coming off two mild winters, where the checklist has quietly become optional.
- Anything mid-renovation: heat off, trades using the outdoor tap in November, hose left connected.
Two habits close most of that gap. First, read your policy wording before you need it. Property policies commonly carry conditions about maintaining heat or draining the water system in an unoccupied building, and a vacant unit over the winter is exactly the scenario those clauses were written for. Second, send tenants one short notice in early fall: outdoor taps are being shut off for the season, hoses need to come off, and here is who to call if they need water outside. Then remove the handles or fit locking covers on the taps you cannot supervise, because one warm week in November will convince somebody to wash a car.
Make It a Documented Fall Program
Across a portfolio, the plan to winterize outdoor taps fails on tracking rather than technique. Build a register: property, tap location, tap type, interior shutoff location, irrigation zones, backflow assembly type and last test date. Have the tech photograph the closed shutoff and the open tap at each location and attach it to the job. In February you will know within a minute which buildings were done and by whom, and in April the same register tells the startup crew exactly what to reverse.
The real constraint is vendor capacity in a compressed season. Platforms like PlanaJob let property managers post the scope once and compare quotes from vetted contractors instead of phoning six companies in the same week everyone else is phoning them. Seasonal pricing hinges on route density, which is why quotes for an identical scope vary so widely between vendors, a dynamic covered well in the operations writing at Construction Arbitrage. It is also worth reconfirming insurance and backflow tester certification with your vendor every season, since irrigation and landscape firms change hands often, as the listings at Contractor Exit illustrate.
You can see how portfolio scheduling works on our Canadian property managers page, or create an account and post your fall shutdown scope in a few minutes. More seasonal maintenance guides live on the PlanaJob blog.
None of this is hard work. It is a walk-around, a few valve turns and a couple of hours with a compressor. A 30-minute PlanaJob visit now prevents a five-figure flood in February, and the gap between those two outcomes is a scheduling decision you make in September.
FAQ
Do I still need to winterize outdoor taps if the building has frost-free sillcocks?
Yes. A frost-free only drains if the hose is off and the pipe pitches outward, and neither is guaranteed. Removing hoses, splitters and vacuum breakers is the non-negotiable step. If you do nothing else on a frost-free, do that, then confirm the barrel actually drains when the tap closes.
Can I skip the compressor and just drain the irrigation lines?
Only if the system was designed and installed for gravity draining, with correctly located drain valves and consistent slope, and even then it is a gamble in most of the country. Low spots, rotor bodies and drip tubing hold water that gravity will not move. A blowout is the standard here because it is the only method that reliably empties the laterals.
Who pays when a tenant leaves a hose attached and the pipe splits?
It depends on your lease and on provincial residential tenancy legislation, which differs across the country. Landlords are generally responsible for maintenance and repair, while damage caused by tenant negligence may be recoverable. In practice, prevention beats the argument: give written notice, remove the handles, and keep the dated photo record showing the tap was properly shut off and drained.